
Learn how to use a virtual card step by step: register an account, complete identity verification, add funds, create a card, and make your first payment.
When I first came into contact with virtual cards, what confused me most was not how to open the card, but how to go about the whole process.
Can I open a card directly after registering? What information do I need to prepare for real-name authentication? Does the recharge go into the platform account or directly into the card? Once the card is opened, how should I use it to pay?
Especially when using it for the first time, seeing so many functions in the background, I really don’t know where to start.
I recently sorted out the usage process of UeePay (Youyifu) and found that it is not as complicated as I thought. Basically, it means registering, real-name authentication, recharging, opening a card, transferring balance, and then going to the merchant website to pay.
However, some details must be clarified in advance, otherwise it will be easy to recharge the card but not be able to open it, or there is a balance in the card but the payment fails.
This article will sort out the entire process according to the order of operations for new users, and talk about a few easily overlooked points.
1. Register an account first, don’t rush to recharge
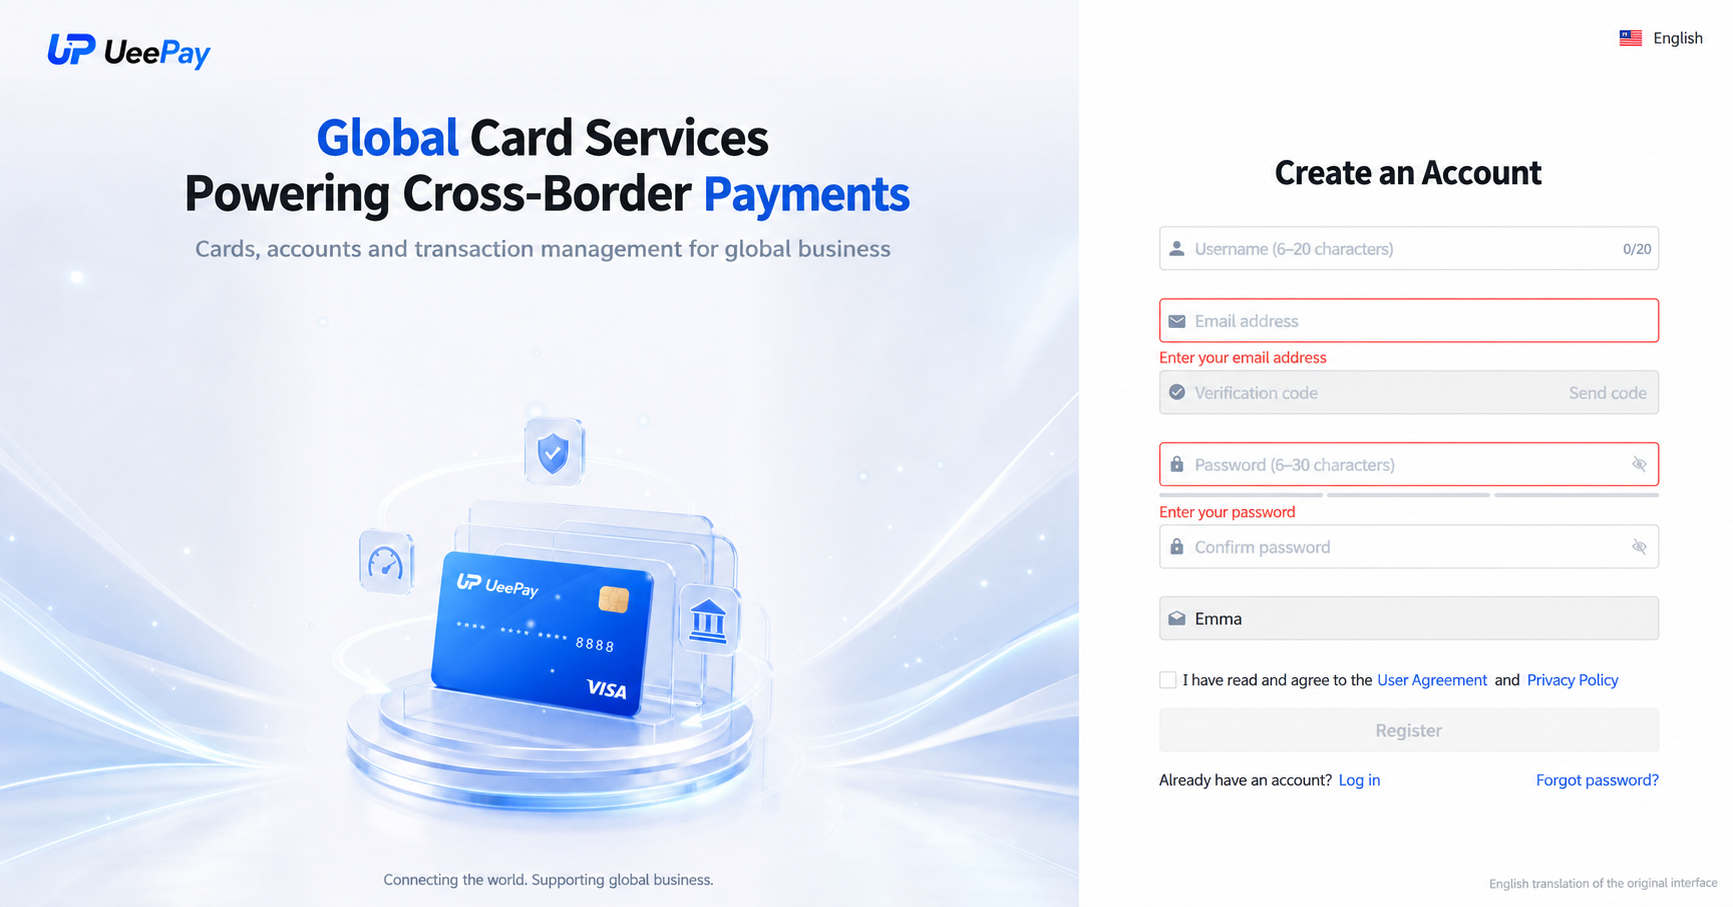
First enter the UeePay registration page:
Registered address: https://ueepay.com/register?invite_code=Emma
Registration is not complicated. Just fill in the relevant information according to the prompts on the page and complete the verification.
After successful registration, you can log in to the backend to see what functions are available, such as real-name authentication, account recharge, card management, transaction records, etc.
Here’s something to make clear in advance:
Successful registration does not mean that you can open a card for consumption immediately.
Therefore, it is recommended to complete the authentication first and make sure that the account can be used normally before considering recharging it.
2. How to operate real-name authentication?
Real-name authentication may be a little more troublesome than registration.
UeePay currently has two methods: personal authentication and enterprise authentication. You can choose according to your actual situation.
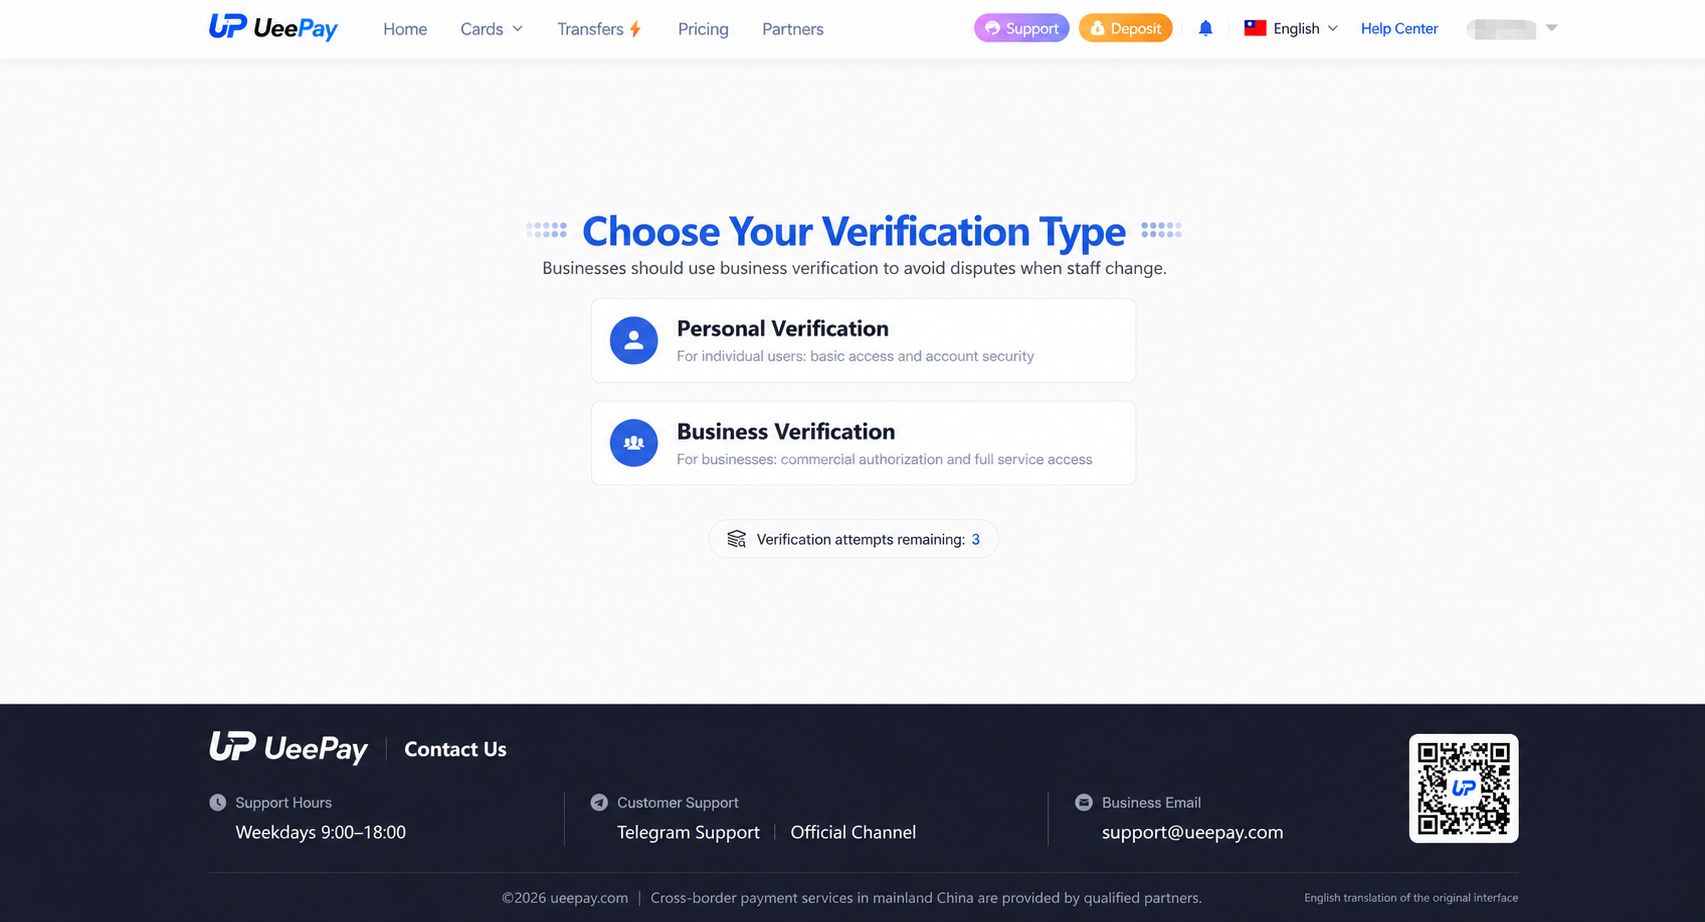
1. Personal certification
If you only use the virtual card yourself, such as subscribing to AI tools, purchasing cloud services, or paying for some overseas websites, you can first check the requirements for personal certification.
Generally, you need to submit your passport and other identity information according to the prompts on the page.
There are a few details it’s best to pay attention to:
- The name, date of birth and other information on the document must be consistent with the information filled in.
- The uploaded photos should be as clear as possible, and the edges of the document should not be cropped or have obvious reflections.
- If you are required to supplement proof of overseas residential address, provide recent water, electricity and gas bills, bank statements and other valid information as required.
- After submission, wait for review. Do not register new accounts repeatedly just because it has not been approved temporarily.
If the audit fails, first look at the specific reasons prompted by the system.
For example, the certificate type is not supported, the identification of certificate information is inconsistent, the photo does not meet the requirements, etc., the processing methods are different.
Don’t rush to submit again and again. It’s easier to clarify the problem first.
2. Enterprise certification
If it is a company business, for example, you need to open cards in batches, manage multiple virtual cards, or prepare to connect to API later, you can learn about enterprise certification.
Enterprise certification requires the submission of non-mainland Chinese enterprise information that meets the platform’s requirements. The specific certification requirements displayed in the background shall prevail.
Ordinary users don’t need to think it’s complicated just because they see enterprise certification. If it’s just for personal consumption, they can choose according to their actual use.
3. How to recharge after passing the certification?
After the authentication is passed and the account recharge function is opened normally, you can prepare to recharge.
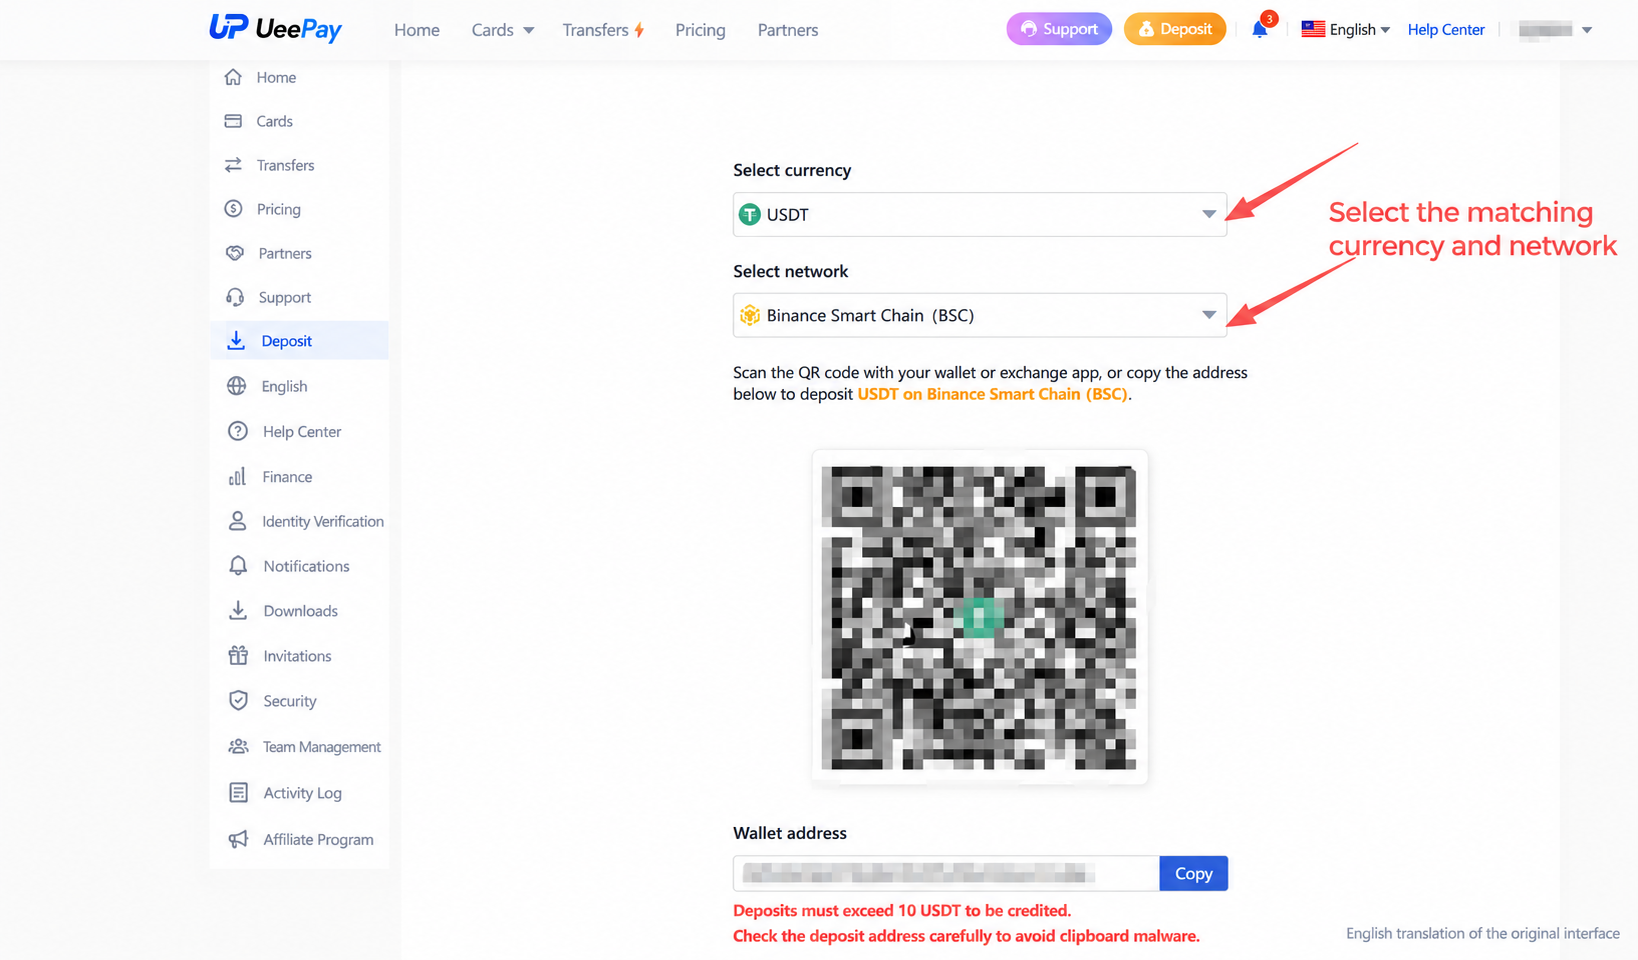
The recharge assets supported by UeePay are USDT and USDC. The specific available currencies and networks are subject to the recharge page.
But there is a problem here, it is especially easy for new users to get confused:
Account balance and card balance are two different things.
The simple understanding is:
Account balance: The money is first placed in the UeePay platform account.
Card balance: The money transferred from the account to a virtual card is the balance that can be used for payment on this card.
In other words, if you successfully recharge your platform account, it does not mean that there will automatically be money in the newly opened card.
Before recharging, it’s best to know the fees.
Things to note at the moment include:
- Recharge fee: about 1%–2%, the details are subject to the page display.
- Card opening fee: Different card segments may differ, about 1–2 USD/card, please refer to the actual card opening page.
- Recharge time: usually about 2-5 minutes, depending on the actual processing situation.
- Minimum deposit amount: must be greater than 10 USD.
- Minimum transfer amount per card: 20 USD.
Give a simple example.
Suppose you plan to subscribe to an overseas service for about US$20. It is not necessarily enough to add US$20 to the account.
Because you also have to consider recharge fees, card opening fees, and other fees that may be incurred when making payments.
Therefore, before using it for the first time, it is best to calculate how much funds are actually needed to avoid finding out that the balance is insufficient after opening the card.
There is another very important point when recharging
Be sure to check the currency, network, deposit address and amount.
For example, if the recharge page requires the use of a certain network, you must ensure that the transfer platform selects the corresponding network.
Don’t see that they are all USDT and think that you can get your account if you choose any chain.
Once the wrong currency, network or address is selected, problems such as inability to enter the account and unrecoverable funds may occur.
In addition, it is recommended to recharge from a fund account that is legally held by the person and has a clear source to avoid affecting the account entry due to fund source or risk control review issues.
4. There is a balance in the account, how to open a card next?
After the account is recharged successfully, you can enter the card opening page.
Here you will see different card segments, which are often mentioned as BIN.
You may not understand what BIN is when you first contact it. In fact, it can be simply understood as the identification number in front of the bank card number. The card issuance channels, card attributes and applicable scenarios corresponding to different card segments may be different.
For example, some people open a card to subscribe to ChatGPT and Claude, some people buy servers and domain names, and some people mainly use it for overseas advertising.
These scenarios may not all be suitable for the same card.
So I think it’s best to decide what you’re going to pay before opening a card, rather than just choosing a card at random.
You can first take a look at the card section introduction, fees and restrictions on the card opening page. If you are unsure about anything, please confirm with customer service.
After selecting, follow the prompts on the page to submit the card application.
After the card is successfully opened, you can check the card status and related information in the background.
Here’s a reminder:
Card number, expiration date, and CVV/CVC security code are all sensitive information. Try not to take screenshots and send them to others.
Especially complete card information, once leaked, may bring unnecessary financial risks.
5. After successfully opening the card, how to complete the first purchase?
Once the card is opened, the next step is to actually use it.
For example, if you plan to subscribe to an overseas AI tool, or purchase services such as cloud servers and domain names, the operating procedures are basically the same.
Step 1: Transfer the balance to the card first
Enter the card management page in the backend, find the card you just opened, and follow the page prompts to transfer funds from your account balance.
Note that this step is to transfer the money from the platform account to the card, not to recharge on the chain.
After the transfer is successful, confirm that the card balance is sufficient to pay for the order.
If it is a foreign currency transaction, you should also consider possible exchange rate differences, verification deductions or other fees.
Step 2: Enter the website that requires payment
For example, if you are ready to subscribe to an AI tool, go to its official website and select the required subscription package.
It is recommended here to check the price and subscription period clearly first.
Especially for auto-renewal services, don’t just pay attention to the first month’s price and ignore that fees will be deducted every subsequent month.
Step 3: Fill in the virtual card information
Select bank card payment on the merchant checkout page, and then fill in the requirements:
- card number
- Validity period
- CVV/CVC security code
- Billing address and other necessary information
The billing address must be filled in according to the actual requirements of the card and merchant. Do not make up the address just for the purpose of payment.
After confirming that the information is correct, submit the payment.
Step 4: Confirm payment result
If the merchant accepts the card, the card status is normal, the balance is sufficient, and the transaction passes verification and risk control review, the payment may be completed.
But here’s a reminder:
Successful activation of the virtual card does not mean successful payment on all websites.
Some websites restrict certain card segments, and some transactions may require additional verification or may be rejected due to merchant or bank risk control.
So if you encounter a payment failure, don’t try many times immediately.
First go back to the backend to see if there are any failure records or error messages to confirm whether it is a balance problem, card status problem, or the merchant does not accept the card.
If you are really not sure, please contact the platform customer service to verify.
Step 5: Go back to the backend to view transaction records
After payment, you can return to the UeePay backend to view the transaction details of the corresponding card.
Mainly confirm the consumption amount, transaction time and transaction status.
If it is an automatically renewed subscription, it is best to note the next deduction date.
If you are not ready to continue the subscription, go to the merchant website in time to cancel the automatic renewal and unbind the payment card if necessary.
This will reduce unnecessary subsequent chargeback attempts.
6. This is the first time I use a virtual card, and there are a few pitfalls that are easy to step on.
The previous process is actually not difficult, but it is best to know the following questions in advance.
1. Don’t open a card directly without confirming the consumption scenario
Not all virtual cards support all merchants.
For example, just because a card can pay for a certain AI tool does not mean that it can also be used for other AI subscriptions or advertising platforms.
It is easier to confirm the usage scenario before opening the card than to test it repeatedly after opening the card.
2. Just because there is money in the account does not mean there is money in the card.
I mentioned this before, but it’s really easy to get confused.
After the account is successfully recharged, the balance needs to be transferred to the specific card.
If there is not enough money in the card, an insufficient balance message may be displayed when making the payment.
3. If payment fails, don’t keep trying again.
Some failures are not caused by balance issues, but by merchant restrictions, card status, transaction verification, or bank risk control.
Repeated submission may not solve the problem, but may increase the failure record.
It is best to confirm the reason before deciding whether to continue paying.
4. Refunds are not received immediately
If the merchant has initiated a refund, it does not mean that the funds will be returned to the card immediately.
Refunds usually also need to be cleared by banks and payment channels, which may take 3–14 working days, depending on the actual processing progress.
If your account does not arrive for a long time, you can prepare the merchant’s refund voucher and transaction information, and then contact the platform to inquire.
5. Remember to cancel any unused subscriptions
This is easily overlooked.
After some users open a card and subscribe to the service, they no longer intend to use it, so they directly transfer the card balance or cancel the card.
However, the automatic renewal from the merchant may not be canceled accordingly.
In the next deduction cycle, the merchant may still try to deduct money, resulting in a failure record.
Therefore, it is best to go to the merchant backend to cancel unused subscriptions, and then consider processing the card balance or canceling it after confirming that there is no need for subsequent deductions.
7. A few final words
When you use a virtual card for the first time, you don’t need to make things too complicated.
The whole process is:
Register an account → Complete real-name authentication → Recharge to the account → Select the card segment to open the card → Transfer the balance to the card → Go to the merchant website to pay → View transaction records.
I think what new users need to figure out most is not which card segment is the cheapest, but what they plan to use to pay, whether the account meets the conditions for use, and whether the card can support the corresponding merchants.
Especially if you are using it for the first time, there is no need to open many cards at once, and it is not recommended to recharge too much without understanding the rules.
It will be safer to understand the authentication, recharge and card opening rules first, and then conduct a small-amount test based on actual consumption needs.
If you encounter a payment failure, there is no need to assume that there is a problem with the card right away. First look at the failure prompt, balance and transaction records, which can often help determine where the problem lies.
I hope this summary can help friends who are coming into contact with virtual cards for the first time avoid detours.
Related Guides
Before choosing a provider, read our virtual card selection and payment troubleshooting guide. To plan your initial budget, compare card opening and funding fees.
本文由 VCCMap 虚拟卡指南整理,转载请注明出处:https://vccmap.com/en/how-to-use-a-virtual-card-for-the-first-time-how-to-register-recharge-and-open-a-card-compiled-a-tutorial-for-beginners%e3%80%8b/

